

A Guide To Setting Up Your Documents For Export
Content Summary
In this presentation, you will learn how to...
Why Procreate?
I have been using Procreate for 6 years and it is one of my favorite methods of creating artwork. It is also the number one software I recommend for artists new to digital media, and for many good reasons. For starters, the iPad and Apple pencil are the some of the most accessible digital drawing tools since they are multipurpose items. Many people already own an iPad for personal use. They are lightweight, travel well, and do not have to be connected to a PC to work, which is a big plus. Procreate's software is the best beginner-level drawing application that runs on the iPad. It is a one-time purchase, will update with all future software releases for free, and contains an easy user interface. Savage Interactive, the company that created Procreate, has a website with tutorials on how to use all of their tools. There is also a large quantity of user-generated tutorials on YouTube. I learned all of what I know through these tutorials and through personal experience.
Setting Up A Procreate File
Starting from your procreate home page, press the + in the upper right-hand corner.

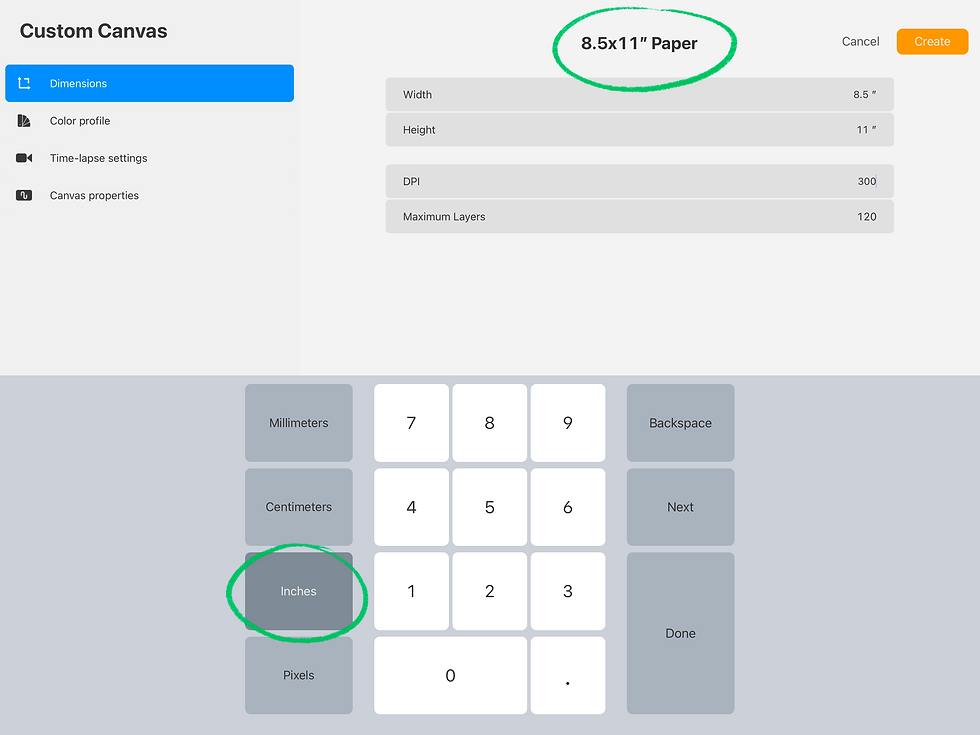
Name your new document to the size of the paper you want to print. Change your unit of measurement to inches.
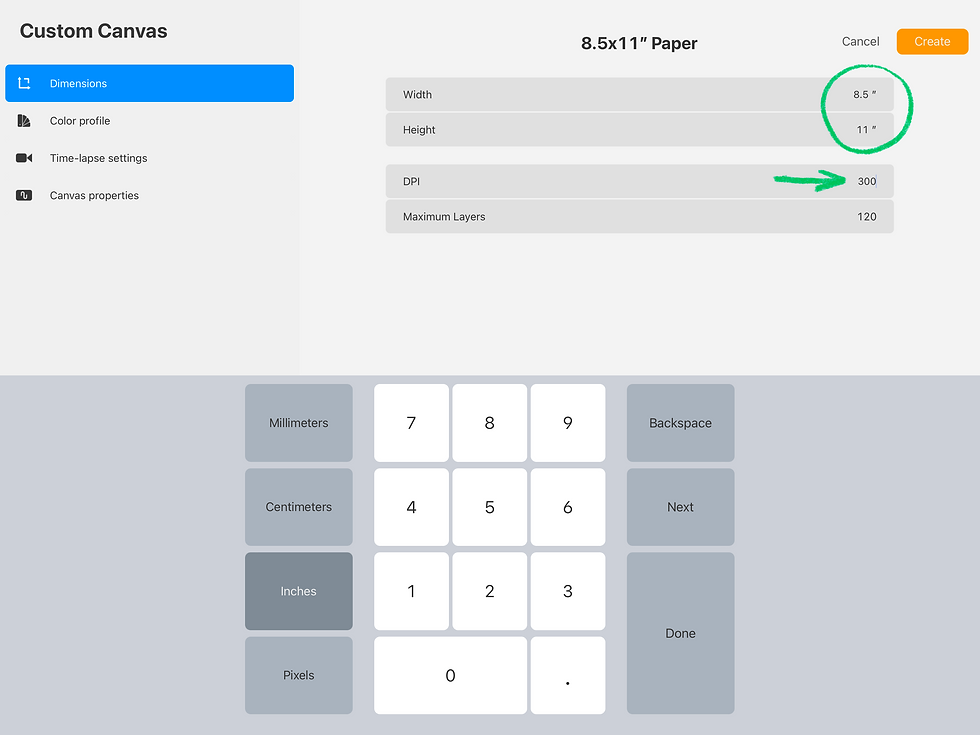
Set your document dimensions to match those of the paper you’re printing. Set your DPI to 300.
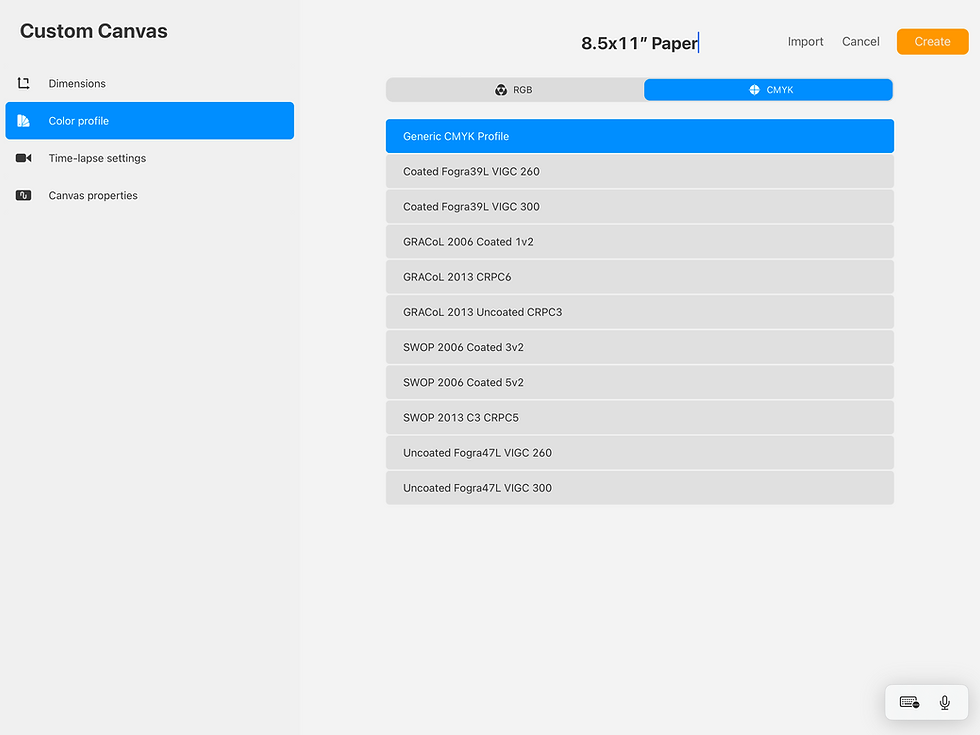
On the left-hand side menu, click “Color profile.” Change your color space to CMYK and click “Generic CMYK Profile.” Click the orange “Create” button.
CMYK vs RGB
CMYK (cyan, magenta, yellow, and black) is used for printing. The ink colors all mixed together create black. This is called subtractive mixing.
RGB (red, green, blue) is what makes colors on your screen. The light of the screen mixes those three colors to make white. This is called additive mixing. When setting up a document that is only for creating a file to export and print, you want it to be in CMYK.
When setting up a document to draw in digitally, you want it to be in RGB.
RGB to CMYK
RGB documents can create millions of colors, while CMYK documents can only create thousands.
When drawing digitally, always start in RGB so that your art captures the vibrant color to be viewed on other screens. After finishing you can export your work as a .JPG or a .PNG and import it into a document set up in CMYK for printing. Then you can tweak the color as needed before printing.
Setting Up A Grid
On the top menu bar, click the wrench icon to open the toolbar. Click the “Canvas” section and turn on the toggle “Drawing Guide.” Then click “Edit Drawing Guide” below that.

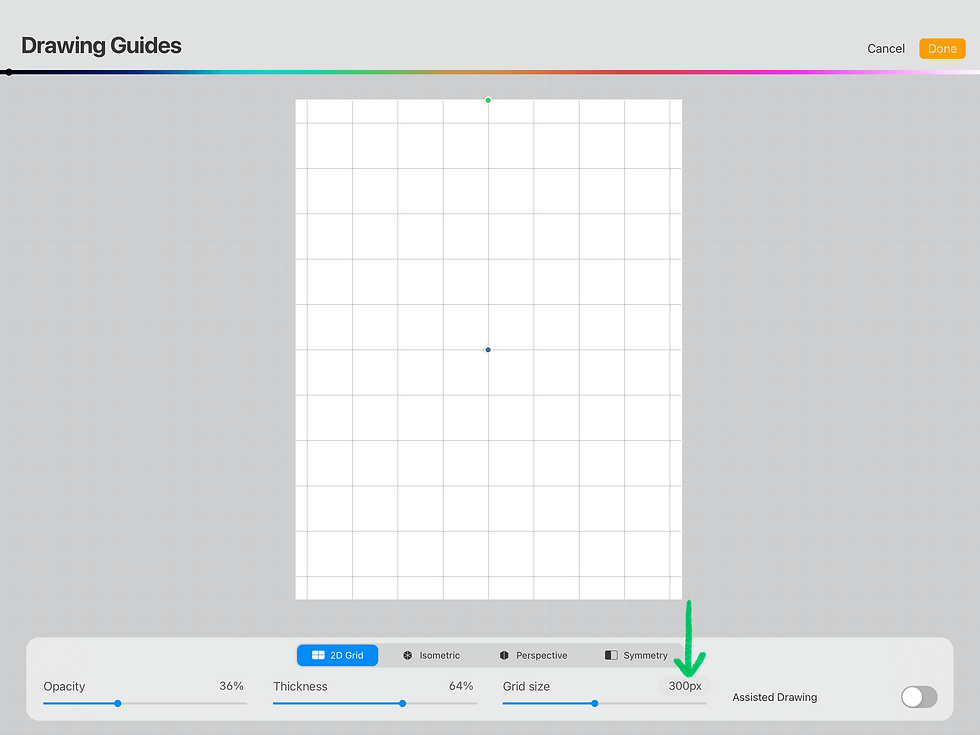
In the bottom menu, set your grid size to 300px. Your grid size should reflect the DPI you set up earlier. If you set your DPI to 300, your grid size should be set to 300px. Each of these boxes is 1 inch squared.
Importing A Photo
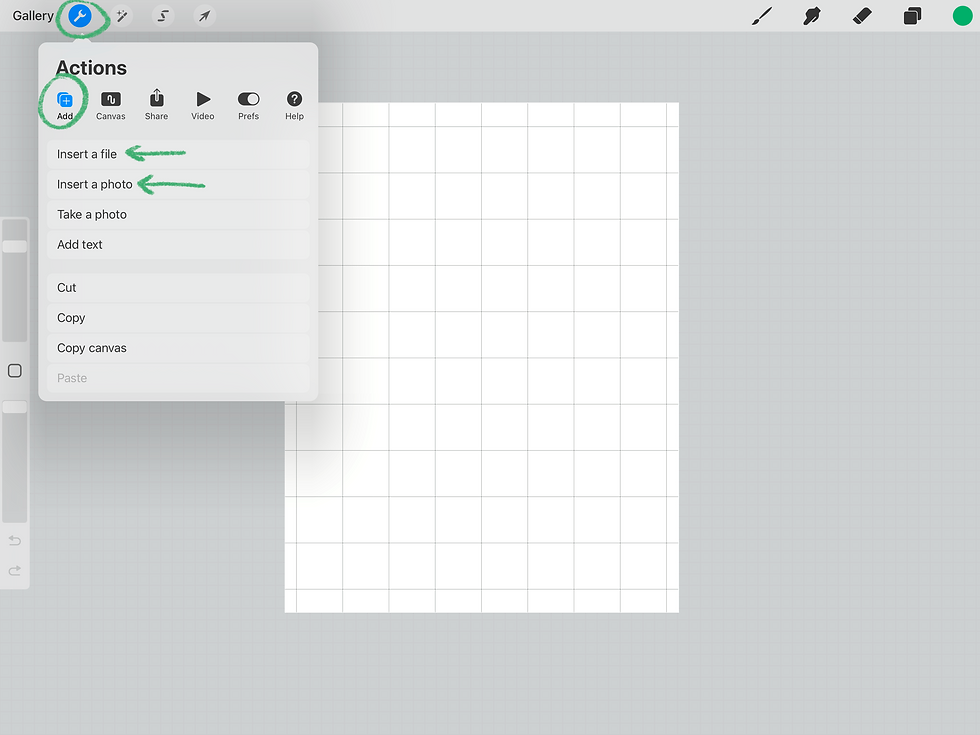
On the top menu bar, click the wrench icon to open the toolbar. Click the “Add” section and click “Insert a photo” if the photo is in your camera roll. Click “Insert a file” if the photo is saved to your device’s files.
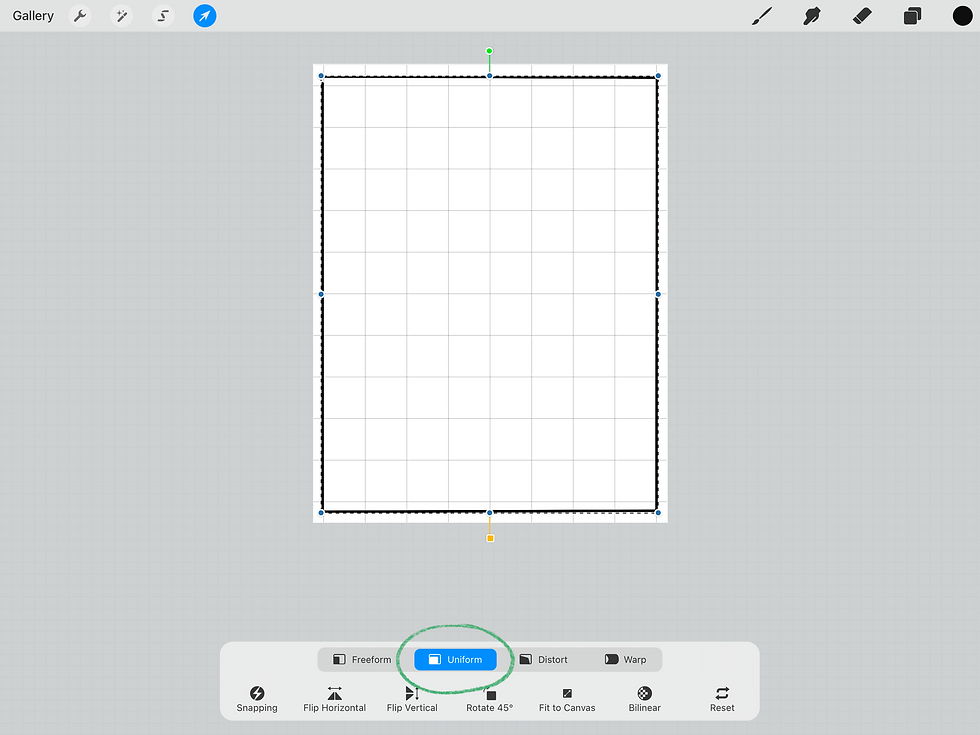
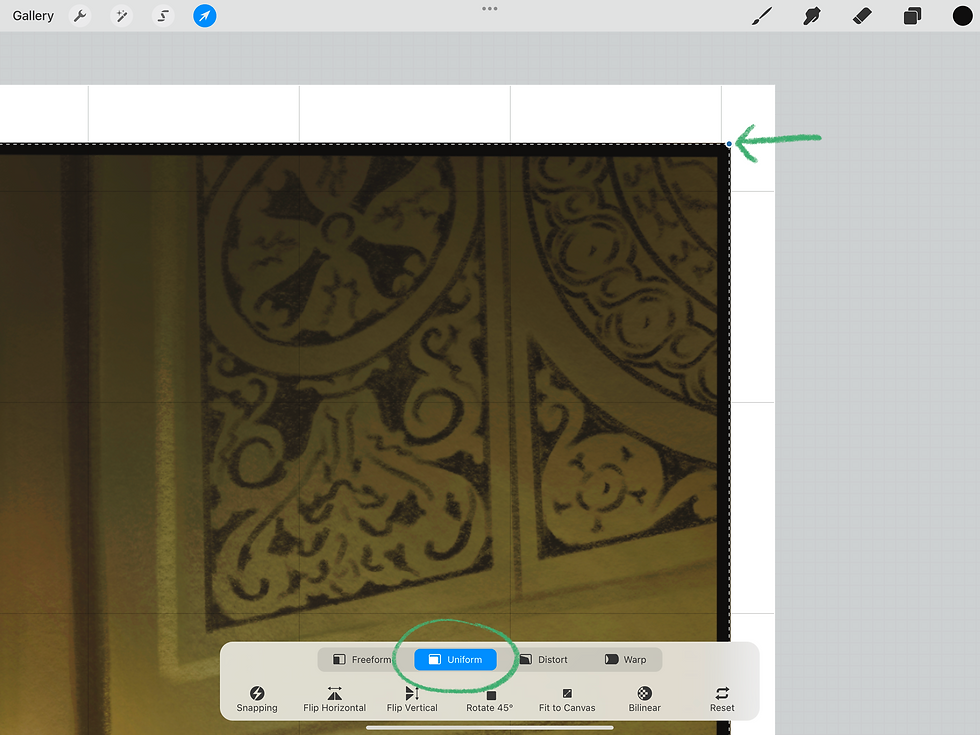
The photo has been imported to your document and now you can resize it. Make sure your settings are on “Uniform" so you don’t distort the image.

Full Bleed Printing
When you want your paper to print the entire image without creating your own margins, that is called a full bleed. Drag the corners of your image to fill your canvas completely. Some edges may be cut off if the aspect ratios are different.

No Bleed Printing
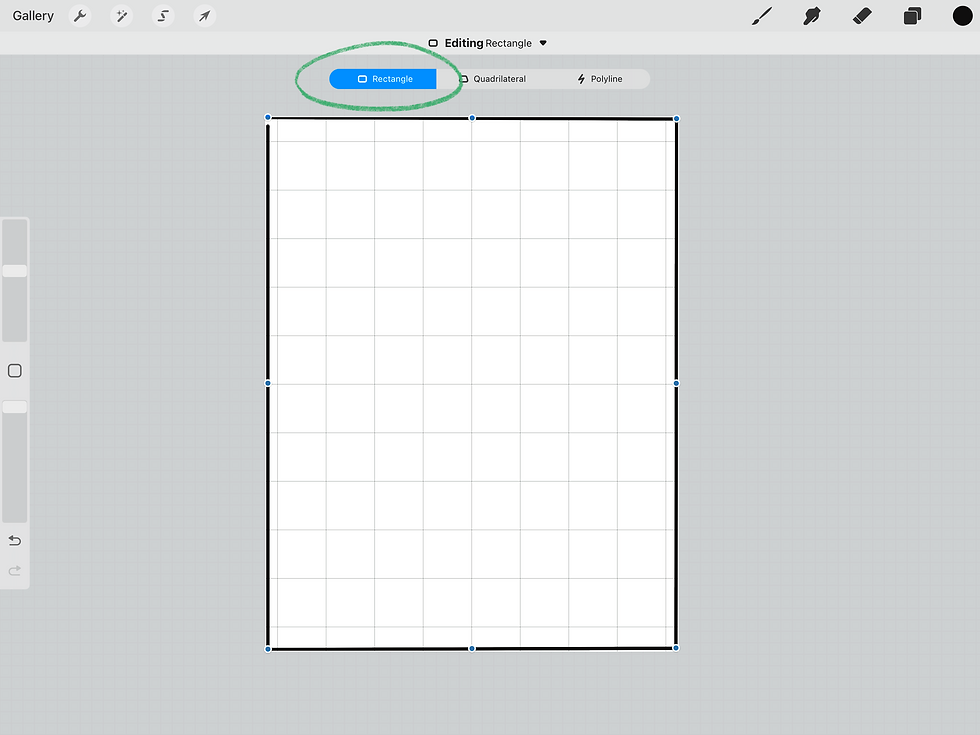
To create a rectangle with straight edges, draw a box in one motion without lifting your pen. At the end of the movement, keep your pen on the screen. The shape creator will pop up and your lines will automatically straighten. Select “Rectangle” as your shape. Drag the edges on your box to the edges of your canvas.
Click the gray space to place your rectangle. On the top menu bar, click the arrow icon to open the scaling tool. Make sure your settings are on “Uniform” and scale your box to the size you want. Remember, one box is 1 inch square.
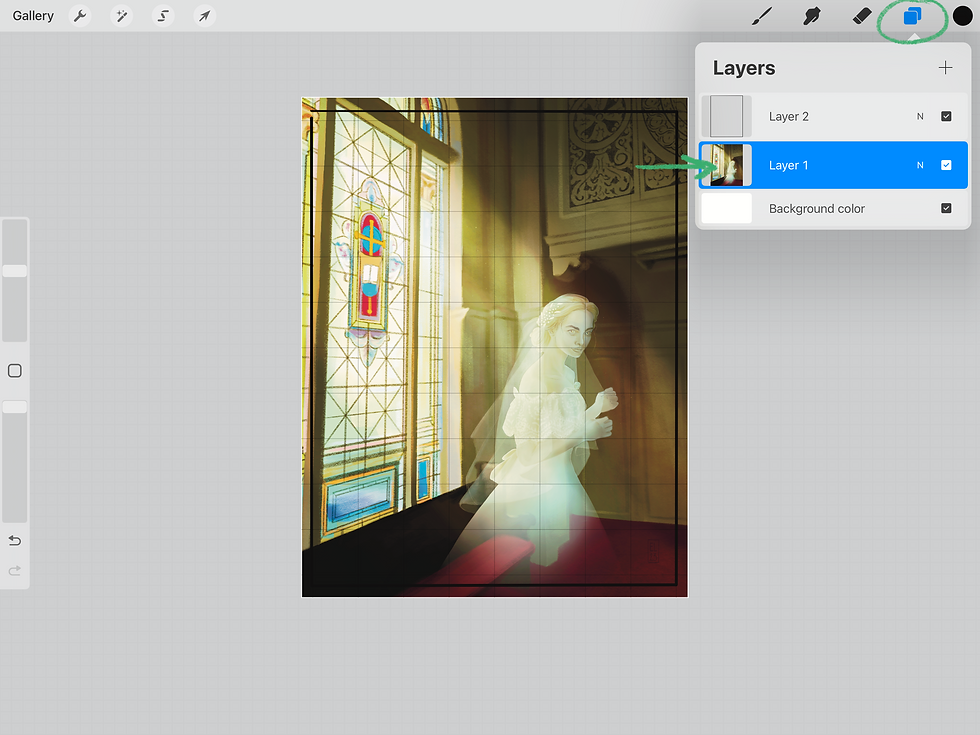
Import your photo and open the “Layers” menu. Click and drag your photo layer to be below your rectangle layer.
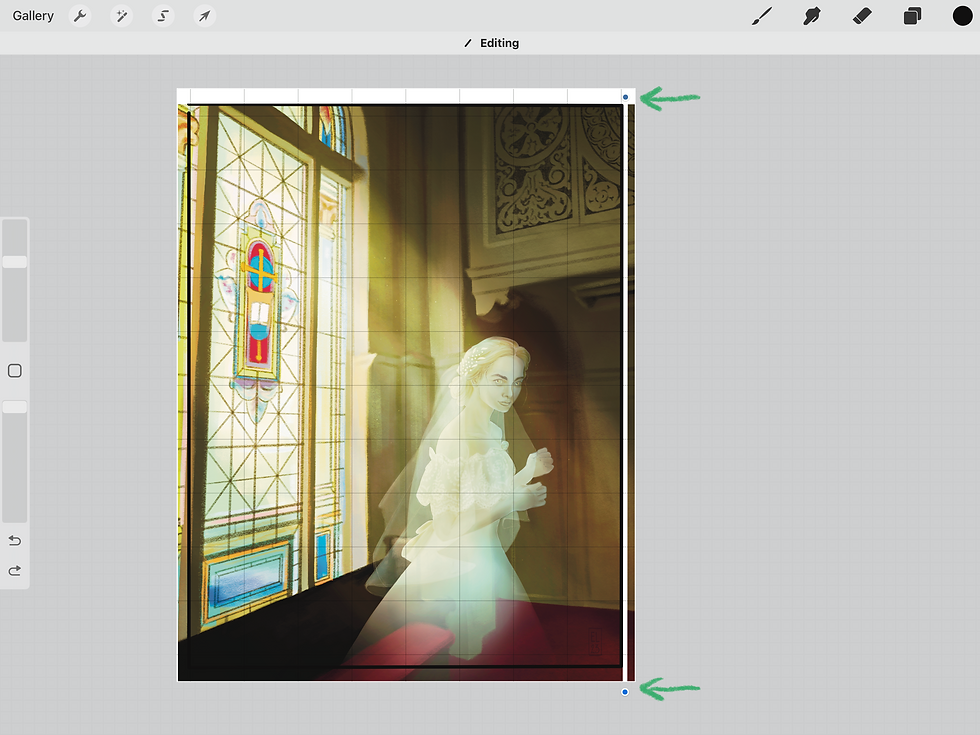
On the top menu bar, click the arrow icon to open the scaling tool. Drag the corners of your photo to the corners of your rectangle. Remember to keep your settings on “Uniform.”
If you format your image within your box and aspect ratios do not match, some of the image will be outside of your rectangle. Click on the eraser icon in the top menu board.

Just like drawing your rectangle, draw a line on the edge you want to erase and don’t pick up your pen. The erase mark will straighten and open the shape creator tool. Line up your erase mark to the outer edges of your rectangle.
After your image is within the rectangle you created, turn off that layer in the layers menu by unchecking the box next to it.

Color Correction: Hue, Saturation, Brightness
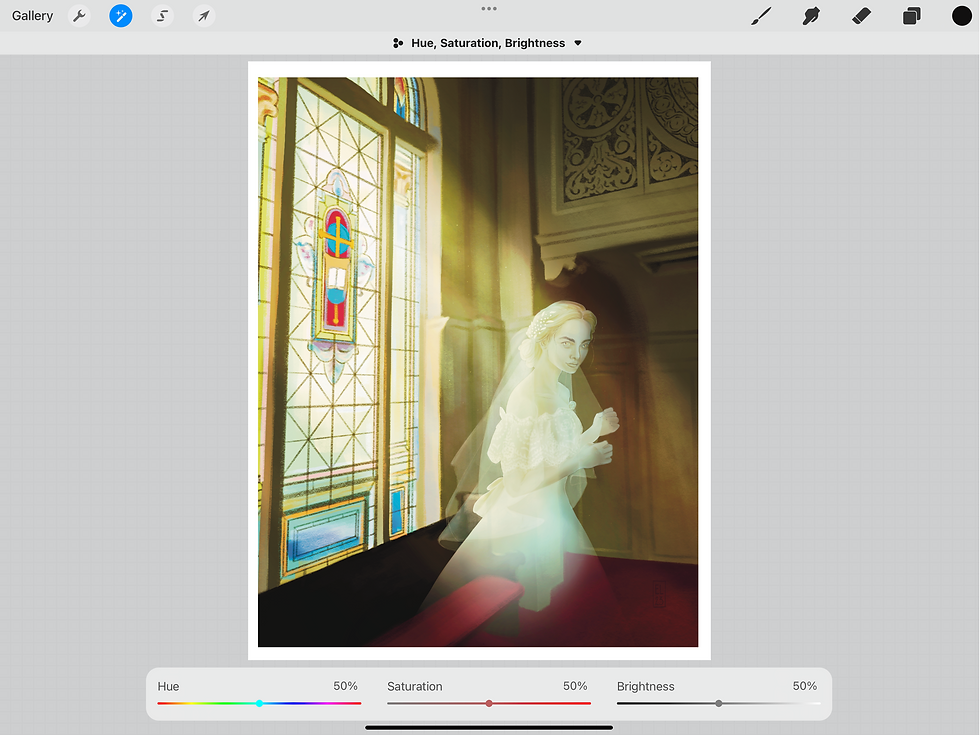
On the top menu bar, click the magic wand icon to open the toolbar. Click on “Hue, Saturation, Brightness” to open the tool.

From this menu, you can adjust the hue, saturation, and brightness of the piece. This can be helpful if transitioning from RGB to CMYK has altered your colors slightly.
Color Correction: Contrast and Color
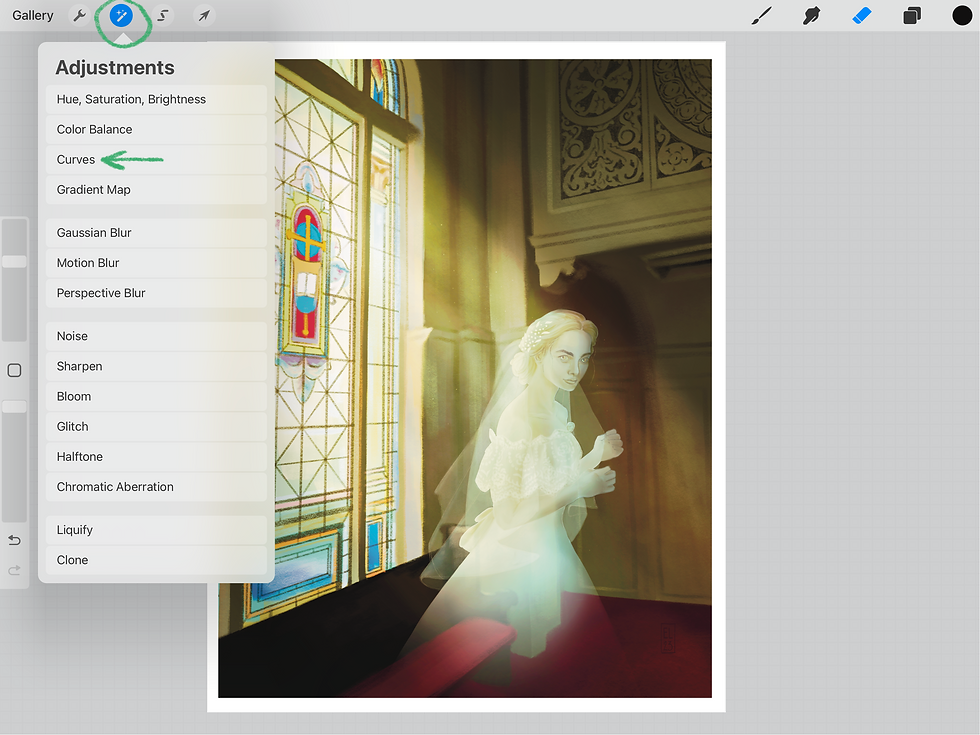
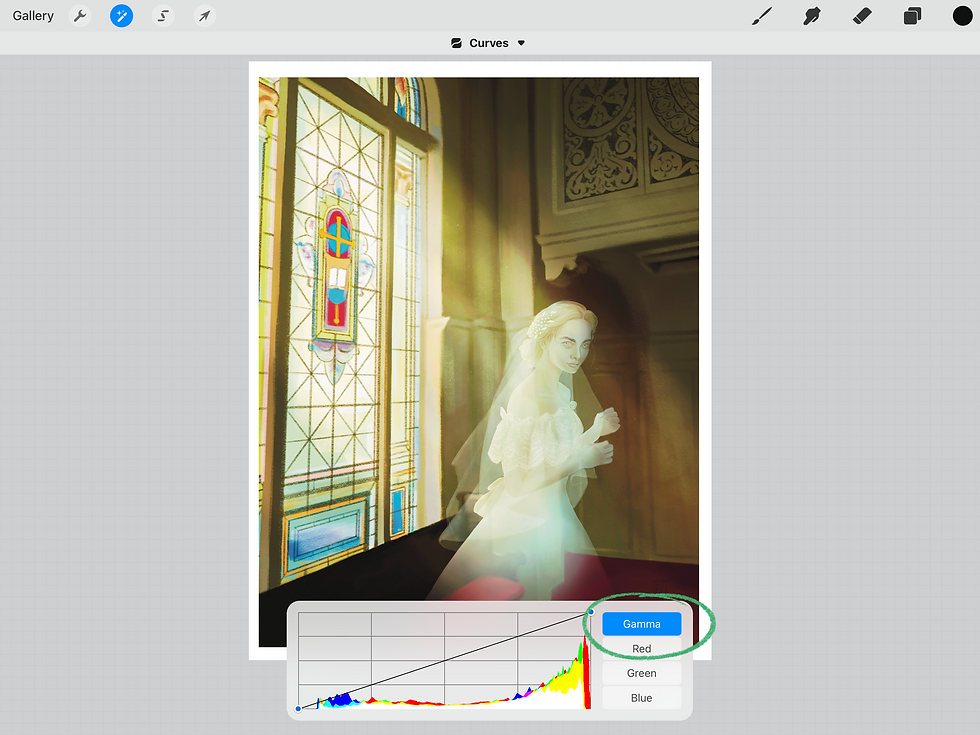
On the top menu bar, click the magic wand icon to open the toolbar. Click on “Curves” to open the tool.
Curves is a powerful tool for adjusting your contrast and color harmony. Just remember that most corrections do not need to be drastic. With curves, less is more.
This is the curves tool. Gamma is the measure of the light in the photo.
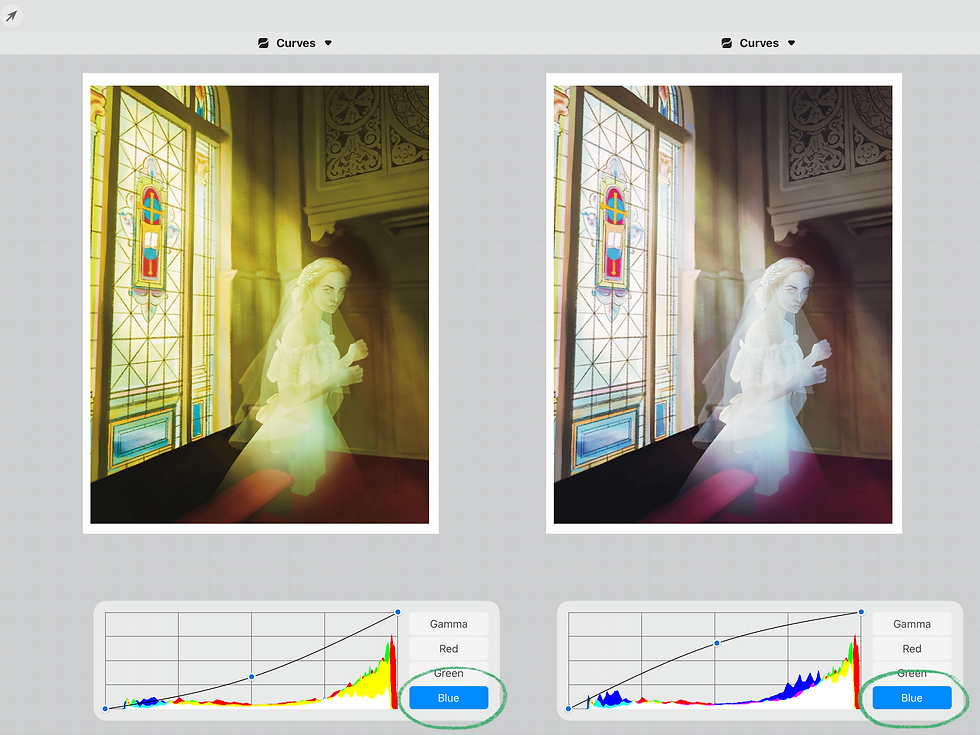
To increase the contrast, create an S curve on the graph. I have increased the contrast dramatically for the demo.

The red graph controls how much red is in the artwork. I have increased the color dramatically for the demo.

The green graph controls how much green is in the artwork. I have increased the color dramatically for the demo.

The blue graph controls how much blue is in the artwork. I have increased the color dramatically for the demo.
Exporting For Printing
On the top menu bar, click the wrench icon to open the toolbar. Click on the “Share” button and choose your file type.

File Types
PDFs are standard for printing. They are large files that do well with a combination of text and images.
JPEGs are not usually a good choice for printing. They compress images and create a muddy effect called “artifacting.” They are perfect for uploading images to social media and websites. JPEGS are smaller files, which means you can store more of them.
PNGs are good options for printing. They are lossless, which means your image will stay crisp. PNGs are medium-sized files.
TIFFs are a special file type used for professional printing. They are huge files, which are good for printing on a large scale. They are not space-efficient for your device.
Comments